Balanced Breakfast Plate

A Simple, Protein-Packed Breakfast to Fuel Your Morning

Some of the healthiest breakfasts aren’t the most complicated—they’re the ones that provide your body with the nutrients it needs to stay energized and satisfied. A balanced breakfast can help you start the day feeling your best by combining high-quality protein, fiber-rich carbohydrates, and naturally sweet fruit into one delicious meal.

This Balanced Breakfast Plate brings together fluffy scrambled eggs, lean turkey bacon, creamy grits, and a colorful side of fresh berries. The eggs and turkey bacon provide satisfying protein, while the grits offer slow-digesting carbohydrates for energy. Fresh berries add fiber, antioxidants, and natural sweetness without relying on processed sugars.

Whether you’re heading to work, getting the kids ready for school, or enjoying a quiet weekend morning, this easy breakfast is both nourishing and comforting. Best of all, it comes together in less than 20 minutes, making it perfect for busy mornings.

Why You’ll Love This Recipe

  • High in protein to help keep you full
  • Balanced with protein, healthy carbohydrates, and fiber
  • Quick and easy to prepare
  • Naturally rich in vitamins and minerals
  • Great for busy weekday mornings
  • Family-friendly and satisfying

Prep Time

5 minutes

Cook Time

10 minutes

Total Time

15 minutes

Servings

1 serving

Ingredients

  • 2 large eggs
  • 1 teaspoon olive oil or avocado oil
  • 1 slice turkey bacon
  • ½ cup cooked stone-ground grits
  • ½ cup fresh mixed berries (strawberries, blueberries, raspberries, or blackberries)
  • Pinch of sea salt
  • Freshly ground black pepper, to taste
  • Chopped fresh parsley (optional garnish)

Instructions

  1. Heat a nonstick skillet over medium heat.
  2. Cook the turkey bacon until browned and slightly crispy, about 3–4 minutes per side. Set aside.
  3. In a small bowl, whisk the eggs with a pinch of salt and pepper.
  4. Add the olive oil to the skillet and gently scramble the eggs over low to medium heat until soft and fluffy.
  5. Warm the cooked grits according to package directions. For extra creaminess, stir in a splash of low-fat milk or unsweetened almond milk.
  6. Arrange the scrambled eggs, turkey bacon, grits, and fresh berries on a plate.
  7. Garnish with fresh parsley if desired and serve immediately.

Recipe Tips

  • Choose stone-ground grits for a hearty texture and more natural flavor.
  • Cook the eggs over low heat to keep them soft and creamy.
  • Add sliced avocado for healthy fats if you want a more filling meal.
  • Sprinkle cinnamon over the berries for extra flavor without added sugar.
  • Pair with water, herbal tea, or unsweetened coffee for a balanced breakfast.

Nutrition Facts

Per Serving (Approximate)

Nutrient Amount
Calories 340
Protein 22 g
Carbohydrates 28 g
Dietary Fiber 4 g
Total Sugars 8 g
Added Sugar 0 g
Total Fat 15 g
Saturated Fat 4 g
Cholesterol 375 mg
Sodium 420 mg
Potassium 420 mg
Calcium 10% DV
Iron 12% DV
Vitamin A 18% DV
Vitamin C 35% DV
Folate 15% DV

Health Benefits

Protein to Keep You Full

Eggs and turkey bacon provide high-quality protein that helps support muscle maintenance and can keep you feeling satisfied throughout the morning.

Steady Energy

Grits provide complex carbohydrates that supply your body with energy, making them an excellent addition to a balanced breakfast when paired with protein and fiber.

Rich in Antioxidants

Berries are packed with antioxidants, including anthocyanins and vitamin C, which help protect cells from oxidative stress and support overall health.

Supports Blood Sugar Balance

Combining protein, carbohydrates, and fiber in one meal may help slow digestion and promote more stable energy levels compared with eating refined carbohydrates alone.

Packed with Essential Nutrients

This breakfast provides vitamins, minerals, and healthy nutrients including vitamin B12, choline, vitamin C, potassium, and iron to help support your body’s daily functions.

Variations

Higher Fiber

Use whole-grain grits and add 1 tablespoon of ground flaxseed to the berries.

Extra Protein

Serve with an additional egg or a side of plain Greek yogurt.

Heart-Healthy Version

Add sliced avocado and reduce the grits to ¼ cup for a meal with more healthy fats and fewer refined carbohydrates.

Vegetarian Option

Replace the turkey bacon with sautéed mushrooms or grilled tomatoes for a flavorful meat-free breakfast.

Storage

This breakfast is best enjoyed fresh. If preparing ahead, store the eggs, grits, turkey bacon, and berries in separate airtight containers in the refrigerator for up to 2 days. Reheat the eggs and grits gently before serving and add the fresh berries just before eating.

Frequently Asked Questions

Can I use instant grits?
Yes. Instant grits are convenient for busy mornings, though stone-ground grits typically offer a heartier texture and richer flavor.

Can I meal prep this breakfast?
Absolutely. Cook the eggs, turkey bacon, and grits ahead of time and portion them into meal-prep containers. Add the berries just before serving for the freshest taste.

Can I add vegetables?
Yes. Spinach, tomatoes, bell peppers, onions, or mushrooms make excellent additions to the scrambled eggs for extra fiber and nutrients.

Is this breakfast good for healthy eating?
Yes. This meal combines lean protein, complex carbohydrates, fiber-rich fruit, and healthy fats to create a balanced breakfast that supports lasting energy and overall wellness.

Healthy Herb-Roasted Whole Holiday Turkey

A Juicy, Flavorful Centerpiece That’s Perfect for Every Holiday Table

Nothing brings family and friends together quite like a beautifully roasted turkey fresh from the oven. The aroma of garlic, rosemary, thyme, and sage filling the kitchen is one of the most comforting parts of the holiday season. While traditional holiday meals are often thought of as indulgent, a well-prepared roasted turkey is actually one of the healthiest proteins you can serve.

This Healthy Herb-Roasted Whole Holiday Turkey is seasoned with fresh herbs, garlic, olive oil, and citrus instead of heavy butter, allowing the natural flavors of the turkey to shine while keeping every bite incredibly juicy. Slow roasting helps lock in moisture, creating tender meat with perfectly crisp, golden skin.

Whether you’re preparing Thanksgiving dinner, Christmas lunch, or simply celebrating a special gathering with loved ones, this recipe delivers restaurant-quality flavor while providing plenty of lean protein and essential nutrients.

Why You’ll Love This Recipe

  • Tender, juicy meat every time
  • Crispy golden skin
  • Naturally flavorful with fresh herbs
  • Lower in saturated fat than traditional recipes
  • High in lean protein
  • Perfect for holidays and family gatherings

Prep Time

30 minutes

Cook Time

3 hours 30 minutes

Rest Time

30 minutes

Total Time

4 hours 30 minutes

Servings

12 servings

Ingredients

  • 1 whole turkey (12–14 pounds), thawed
  • 2 tablespoons extra-virgin olive oil
  • 1 tablespoon garlic powder
  • 6 cloves garlic, minced
  • 2 teaspoons onion powder
  • 2 teaspoons paprika
  • 2 teaspoons dried thyme
  • 2 teaspoons dried rosemary
  • 2 teaspoons dried sage
  • 1 teaspoon black pepper
  • 2 teaspoons kosher salt
  • 1 large onion, quartered
  • 1 lemon, halved
  • 1 orange, halved
  • 4 celery stalks, cut into large pieces
  • 3 carrots, cut into large chunks
  • 6 fresh rosemary sprigs
  • 8 fresh thyme sprigs
  • 1 cup low-sodium chicken broth

Instructions

  1. Preheat your oven to 325°F (163°C).
  2. Remove the giblets and neck from the turkey and pat the turkey completely dry with paper towels.
  3. In a small bowl, combine the olive oil, garlic, garlic powder, onion powder, paprika, thyme, rosemary, sage, salt, and pepper.
  4. Rub the herb mixture all over the turkey, including underneath the skin over the breast whenever possible.
  5. Stuff the cavity with the onion, lemon, orange, celery, carrots, rosemary, and thyme.
  6. Place the turkey breast-side up on a roasting rack inside a large roasting pan.
  7. Pour the chicken broth into the bottom of the roasting pan.
  8. Roast uncovered for approximately 13–15 minutes per pound, or until the thickest part of the thigh reaches 165°F (74°C) using a meat thermometer.
  9. If the skin begins browning too quickly, loosely tent the turkey with aluminum foil.
  10. Remove from the oven and let the turkey rest for 30 minutes before carving to allow the juices to redistribute.

Recipe Tips

  • Bring the turkey to room temperature for about 30 minutes before roasting.
  • Pat the skin completely dry for crispier skin.
  • Avoid opening the oven frequently, which can lower the cooking temperature.
  • Always use a meat thermometer for the most accurate results.
  • Save the pan drippings to make homemade turkey gravy.

Nutrition Facts

Per Serving (Approximate, without skin)

Nutrient Amount
Calories 285
Protein 43 g
Carbohydrates 3 g
Dietary Fiber 1 g
Total Sugars 1 g
Total Fat 10 g
Saturated Fat 2.5 g
Cholesterol 115 mg
Sodium 370 mg
Potassium 520 mg
Iron 10% DV
Zinc 30% DV
Vitamin B6 35% DV
Vitamin B12 45% DV
Niacin 55% DV
Selenium 60% DV

Health Benefits

Excellent Source of Lean Protein

Turkey provides high-quality protein that supports muscle maintenance, tissue repair, and helps keep you feeling satisfied after meals.

Rich in B Vitamins

Turkey contains niacin, vitamin B6, and vitamin B12, nutrients that help your body convert food into energy while supporting healthy brain and nervous system function.

Supports Immune Health

Turkey is naturally rich in selenium and zinc, two minerals that play important roles in maintaining a healthy immune system.

Lower in Saturated Fat

Using olive oil and fresh herbs instead of large amounts of butter reduces saturated fat while still producing flavorful, juicy meat.

Naturally Flavorful

Fresh herbs, garlic, citrus, and vegetables infuse the turkey with delicious flavor without relying on excessive salt or processed seasonings.

Variations

Lemon Herb Turkey

Double the fresh lemon and rosemary for a bright citrus flavor.

Garlic Herb Butter Version

Replace half of the olive oil with softened light butter for a richer holiday flavor.

Cajun Turkey

Add Cajun seasoning, smoked paprika, cayenne pepper, and garlic for a Southern-inspired twist.

Mediterranean Style

Season with oregano, rosemary, garlic, lemon zest, and parsley for fresh Mediterranean flavors.

Storage

Store leftover turkey in an airtight container in the refrigerator for up to 4 days. For longer storage, freeze carved turkey in freezer-safe containers for up to 3 months. Thaw overnight in the refrigerator before reheating.

Frequently Asked Questions

Should I rinse my turkey before cooking?
Do whatever makes you feel comfortable, but the general answer to this question is No. Rinsing raw poultry can spread bacteria around your sink and kitchen. Simply pat the turkey dry with paper towels before seasoning.

How do I know when my turkey is done?
Insert a meat thermometer into the thickest part of the thigh without touching the bone. The turkey is fully cooked when it reaches 165°F (74°C).

Why should I let the turkey rest before carving?
Resting allows the juices to redistribute throughout the meat, resulting in a juicier, more tender turkey.

Can I prepare the turkey the night before?
Yes. Season the turkey, cover it, and refrigerate overnight. Remove it from the refrigerator about 30 minutes before roasting so it can begin to come closer to room temperature for more even cooking.

Healthy Delicious Green Smoothie

A Refreshing, Creamy Smoothie That Makes Eating More Greens Easy

Starting your day with a green smoothie is one of the easiest ways to nourish your body without spending hours in the kitchen. While some people think green smoothies taste grassy or bitter, this recipe is anything but. Sweet banana and juicy mango naturally balance the fresh spinach, creating a creamy, refreshing drink that’s packed with vitamins, minerals, fiber, and protein.

Whether you’re rushing out the door in the morning, looking for a healthy afternoon snack, or trying to add more fruits and vegetables to your diet, this smoothie delivers both great taste and excellent nutrition. The avocado creates a silky texture while providing heart-healthy fats, and Greek yogurt adds satisfying protein to help keep you feeling full for hours.

If you’re new to green smoothies, this is the perfect recipe to start with. It’s naturally sweet, incredibly creamy, and a delicious reminder that healthy eating doesn’t have to be boring.

Why You’ll Love This Recipe

  • Naturally sweet with no refined sugar
  • Packed with leafy greens
  • Rich in protein and fiber
  • Ready in just 5 minutes
  • Creamy, refreshing, and satisfying
  • Perfect for breakfast or a healthy snack

Prep Time

5 minutes

Cook Time

0 minutes

Total Time

5 minutes

Servings

2 smoothies

Ingredients

  • 2 cups fresh baby spinach
  • 1 frozen ripe banana
  • 1 cup frozen mango chunks
  • ½ ripe avocado
  • ¾ cup plain nonfat Greek yogurt
  • 1 cup unsweetened almond milk
  • 1 tablespoon chia seeds
  • 1 teaspoon pure vanilla extract
  • Juice of ½ lemon
  • ½ teaspoon fresh grated ginger (optional)
  • ½ cup ice cubes (optional)

Instructions

  1. Pour the almond milk into a high-powered blender.
  2. Add the spinach, frozen banana, frozen mango, avocado, Greek yogurt, chia seeds, vanilla, lemon juice, and ginger.
  3. Blend for 60–90 seconds until completely smooth and creamy.
  4. Add ice cubes if you’d like a thicker, colder smoothie and blend again.
  5. Pour into two glasses and enjoy immediately.

Recipe Tips

  • Freeze ripe bananas ahead of time for the creamiest texture.
  • Blend the spinach and almond milk first for an extra-smooth consistency.
  • Use frozen fruit instead of ice for a richer flavor.
  • Add a scoop of vanilla protein powder for an even more filling meal.
  • Garnish with a slice of kiwi or a sprinkle of chia seeds for a beautiful presentation.

Nutrition Facts

Per Serving (Approximate)

Nutrient Amount
Calories 255
Protein 16 g
Carbohydrates 30 g
Dietary Fiber 8 g
Total Sugars 18 g
Added Sugar 0 g
Total Fat 9 g
Saturated Fat 1.5 g
Cholesterol 5 mg
Sodium 125 mg
Potassium 760 mg
Calcium 25% DV
Iron 12% DV
Vitamin A 95% DV
Vitamin C 90% DV
Vitamin K 140% DV
Folate 35% DV

Health Benefits

Packed with Nutrient-Rich Greens

Spinach is loaded with vitamins A, C, and K, along with folate and iron, making it an excellent way to increase your daily vegetable intake.

Supports Digestive Health

Spinach, mango, banana, avocado, and chia seeds provide plenty of fiber to help support healthy digestion and promote fullness.

High in Protein

Greek yogurt provides high-quality protein that can help support muscle health and keep hunger under control between meals.

Heart-Healthy Fats

Avocado and chia seeds contain healthy unsaturated fats that support heart health and contribute to a creamy, satisfying texture.

Naturally Energizing

This smoothie combines complex carbohydrates, healthy fats, and protein to provide steady energy without the crash that often follows sugary breakfasts.

Variations

Tropical Green Smoothie

Replace the mango with frozen pineapple and add a few tablespoons of unsweetened coconut flakes.

High-Protein Version

Add one scoop of vanilla protein powder and a little extra almond milk.

Dairy-Free

Use a plain dairy-free yogurt instead of Greek yogurt.

Extra Greens

Add a handful of kale along with the spinach for an even bigger nutritional boost.

Storage

This smoothie is best enjoyed immediately after blending. If you have leftovers, store them in an airtight jar in the refrigerator for up to 24 hours. Shake well before drinking, as natural separation may occur.

Frequently Asked Questions

Can I taste the spinach?
Not much. The sweetness of the banana and mango helps create a smooth, fruity flavor that masks the spinach remarkably well.

Can I make this smoothie ahead of time?
Yes. Blend it the night before and refrigerate it in a sealed container. Shake well before serving.

Can I freeze this smoothie?
Yes. Freeze it in individual freezer-safe containers for up to one month. Thaw overnight in the refrigerator and blend briefly if needed.

Is this smoothie good for breakfast?
Absolutely. With protein, fiber, healthy fats, and plenty of vitamins and minerals, it’s a balanced breakfast that can help keep you satisfied and energized throughout the morning.

Healthy Sweet Potato Pie Smoothie

Creamy, Naturally Sweet & Packed with Nourishing Ingredients

There are few desserts that feel as comforting as a slice of sweet potato pie. The warm spices, creamy filling, and naturally sweet flavor bring back memories of family dinners, holidays, and cozy afternoons. The good news is you don’t have to wait for a special occasion to enjoy those delicious flavors.

This Healthy Sweet Potato Pie Smoothie transforms a classic dessert into a nourishing breakfast or snack that’s loaded with protein, fiber, vitamins, and minerals. Instead of refined sugar and heavy cream, this recipe gets its sweetness from naturally sweet roasted sweet potatoes and ripe banana. Greek yogurt provides a boost of protein to help keep you satisfied, while oats add extra fiber to support digestive health and lasting energy.

Whether you’re looking for a quick breakfast before work, a post-workout recovery drink, or a healthier way to satisfy your sweet tooth, this smoothie delivers all the comforting flavors of sweet potato pie in just five minutes.

Why You’ll Love This Recipe

  • Tastes like homemade sweet potato pie
  • Naturally sweet with no refined sugar
  • Rich in protein and fiber
  • Loaded with vitamin A for eye and immune health
  • Ready in only 5 minutes
  • Great for breakfast, snacks, or healthy dessert

Prep Time

5 minutes

Cook Time

0 minutes

Total Time

5 minutes

Servings

2 smoothies

Ingredients

  • 1 cup cooked roasted sweet potato, cooled
  • 1 frozen ripe banana
  • ¾ cup plain nonfat Greek yogurt
  • 1 cup unsweetened almond milk
  • ¼ cup old-fashioned rolled oats
  • 1 tablespoon natural almond butter
  • 1 teaspoon pure vanilla extract
  • 1 teaspoon ground cinnamon
  • ¼ teaspoon pumpkin pie spice
  • Pinch of ground nutmeg
  • 1 teaspoon maple syrup or honey (optional)
  • ½ cup ice cubes (optional for a thicker smoothie)

Instructions

  1. Add the almond milk to your blender.
  2. Add the cooked sweet potato, frozen banana, Greek yogurt, oats, almond butter, vanilla, cinnamon, pumpkin pie spice, nutmeg, and optional maple syrup.
  3. Blend for 60–90 seconds until smooth and creamy.
  4. Add ice cubes if you’d like a thicker texture and blend again.
  5. Pour into two glasses.
  6. Sprinkle with a little cinnamon before serving.

Recipe Tips

  • Roasting sweet potatoes instead of boiling them creates a richer, sweeter flavor.
  • Freeze roasted sweet potato cubes for an even creamier smoothie.
  • Use a very ripe frozen banana for natural sweetness.
  • Add a scoop of vanilla protein powder for an extra protein boost.
  • Sprinkle crushed pecans on top for a pie-inspired crunch.

Nutrition Facts

Per Serving (Approximate)

Nutrient Amount
Calories 270
Protein 18 g
Carbohydrates 35 g
Dietary Fiber 6 g
Total Sugars 13 g
Added Sugar 0–2 g (depending on sweetener)
Total Fat 7 g
Saturated Fat 1.5 g
Cholesterol 6 mg
Sodium 140 mg
Potassium 640 mg
Calcium 25% DV
Iron 8% DV
Vitamin A 280% DV
Vitamin C 18% DV

Health Benefits

Rich in Vitamin A

Sweet potatoes are one of the best natural sources of beta-carotene, which your body converts into vitamin A. This nutrient supports healthy vision, skin, immune function, and cell growth.

High in Fiber

The combination of sweet potatoes, oats, and banana provides dietary fiber that supports digestive health and helps you feel full longer.

Excellent Source of Protein

Greek yogurt adds high-quality protein, making this smoothie a satisfying option that can help support muscle maintenance and reduce mid-morning hunger.

Naturally Sweet

This recipe relies primarily on fruit and sweet potato for sweetness, making it a healthier alternative to milkshakes or sugary coffee drinks.

Provides Lasting Energy

Complex carbohydrates from sweet potatoes and oats provide a more gradual release of energy compared to highly refined breakfast foods.

Variations

Higher Protein

Add one scoop of vanilla protein powder.

Dairy-Free

Replace the Greek yogurt with a plain dairy-free yogurt and use your favorite unsweetened plant-based milk.

Extra Fiber

Blend in 1 tablespoon of chia seeds or ground flaxseed.

Fall Flavor

Add a tiny pinch of ground cloves and extra pumpkin pie spice for even more classic sweet potato pie flavor.

Storage

This smoothie tastes best immediately after blending. If you have leftovers, store them in an airtight container in the refrigerator for up to 24 hours. Shake or stir well before serving, as natural separation may occur.

Frequently Asked Questions

Can I use canned sweet potato?
Yes. Use plain canned sweet potato with no added sugar, syrup, or spices. Avoid canned sweet potato pie filling.

Can I make this smoothie ahead of time?
Yes. Blend it the night before and refrigerate in a sealed jar. Give it a good shake before drinking.

Can I freeze it?
Yes. Freeze the smoothie in freezer-safe containers for up to one month. Thaw overnight in the refrigerator and blend briefly if needed to restore its creamy texture.

Is this smoothie healthy for breakfast?
Yes. With protein from Greek yogurt, fiber from oats and sweet potatoes, and healthy fats from almond butter, it’s a balanced breakfast option that can help keep you energized and satisfied throughout the morning.

Chocolate Chia Pudding

A Rich, Creamy Dessert That’s Packed with Fiber, Healthy Fats, and Chocolate Flavor

If you’re craving something chocolatey but want a healthier option, Chocolate Chia Pudding is the perfect solution. This creamy, no-bake dessert is naturally sweetened, loaded with nutrients, and incredibly simple to prepare. Made with chia seeds, unsweetened cocoa powder, and your favorite milk, it transforms into a smooth, pudding-like treat after just a few hours in the refrigerator.

Chia seeds may be tiny, but they’re nutritional powerhouses. They’re an excellent source of fiber, plant-based omega-3 fatty acids, antioxidants, and important minerals like calcium and magnesium. Combined with cocoa powder, which contains antioxidants called flavonoids, this dessert is as nourishing as it is delicious.

Whether you’re looking for a healthy breakfast, afternoon snack, or guilt-free dessert, this Chocolate Chia Pudding is a satisfying way to enjoy chocolate while fueling your body with wholesome ingredients.

Chocolate Chia Pudding Recipe

Prep Time: 10 minutes
Chill Time: 4 hours (or overnight)
Total Time: 4 hours 10 minutes
Servings: 2

Ingredients

  • ¼ cup chia seeds
  • 1 cup unsweetened almond milk (or milk of choice)
  • 2 tablespoons unsweetened cocoa powder
  • 1 tablespoon pure maple syrup or honey
  • ½ teaspoon vanilla extract
  • Pinch of sea salt

Optional Toppings

  • Fresh strawberries
  • Raspberries
  • Blueberries
  • Sliced banana
  • Unsweetened coconut flakes
  • Dark chocolate shavings
  • Chopped almonds or walnuts
  • Hemp hearts

Instructions

Step 1

In a medium bowl or mason jar, combine:

  • Chia seeds
  • Almond milk
  • Cocoa powder
  • Maple syrup
  • Vanilla extract
  • Sea salt

Step 2

Whisk thoroughly until the cocoa powder is fully incorporated and no clumps remain.

Step 3

Let the mixture sit for 5 minutes, then stir again to prevent the chia seeds from settling at the bottom.

Step 4

Cover and refrigerate for at least 4 hours, or overnight, until thick and pudding-like.

Step 5

Stir well before serving.

Step 6

Top with fresh berries, chopped nuts, coconut flakes, or dark chocolate shavings if desired.

Serve chilled.

Nutrition Facts

Per Serving

Nutrient Amount
Calories 215
Protein 6 g
Carbohydrates 20 g
Fat 13 g
Saturated Fat 2 g
Fiber 11 g
Sugar 8 g
Sodium 140 mg
Potassium 280 mg
Calcium 260 mg
Iron 2.5 mg
Omega-3 Fatty Acids Approximately 2,500 mg

Nutrition values are approximate and will vary depending on the ingredients and toppings used.

Why You’ll Love This Recipe

  • Rich, creamy chocolate flavor
  • No baking required
  • High in fiber to help keep you feeling satisfied
  • Naturally sweetened with maple syrup or honey
  • Rich in plant-based omega-3 fatty acids
  • Great for breakfast, snacks, or dessert
  • Easy to meal prep for the week
  • Naturally gluten-free

Helpful Tips

  • Whisk the mixture twice during the first 10 minutes to create a smoother texture.
  • Refrigerate overnight for the thickest, creamiest pudding.
  • Adjust the sweetness by adding more or less maple syrup to suit your taste.
  • For extra protein, stir in a scoop of chocolate or vanilla protein powder and add a little extra milk if needed.
  • Store covered in the refrigerator for up to 5 days, making it perfect for meal prep.

Frequently Asked Questions

Can I use dairy milk instead of almond milk?

Absolutely. Dairy milk, oat milk, soy milk, coconut milk, or any unsweetened milk alternative works well in this recipe.

Can I make it vegan?

Yes! Simply use maple syrup instead of honey and choose a plant-based milk.

Why didn’t my chia pudding thicken?

The mixture usually needs at least 4 hours to set. Be sure to stir twice during the first few minutes and use fresh chia seeds, as older seeds may not absorb liquid as effectively.

Can I freeze chia pudding?

Yes. Freeze it in airtight containers for up to one month. Thaw overnight in the refrigerator and stir before serving.

Is Chocolate Chia Pudding healthy?

Yes. Chia seeds provide fiber, healthy fats, plant-based protein, calcium, and omega-3 fatty acids, while unsweetened cocoa powder adds antioxidants without excess sugar. This recipe is a nutritious alternative to many traditional chocolate desserts and can easily fit into a balanced eating pattern.

Cottage Cheese & Pineapple Bowl

A Refreshing High-Protein Snack That Keeps You Full and Energized

Sometimes the simplest recipes are the most satisfying. This Cottage Cheese & Pineapple Bowl combines creamy cottage cheese with naturally sweet pineapple for a snack that’s refreshing, nutritious, and incredibly easy to prepare.

Cottage cheese has become a favorite among health-conscious women because it’s packed with high-quality protein, calcium, and other essential nutrients that help support muscle health and keep you feeling fuller for longer. Pineapple adds a burst of tropical sweetness while providing vitamin C, antioxidants, and bromelain, a natural enzyme found in pineapple that plays a role in digestion.

Whether you need a quick breakfast, a mid-afternoon snack, or a light dessert, this delicious bowl comes together in just minutes. With no cooking required, it’s perfect for busy mornings, meal prep, or whenever you’re craving something healthy that still tastes like a treat.

Cottage Cheese & Pineapple Bowl Recipe

Prep Time: 5 minutes
Cook Time: 0 minutes
Total Time: 5 minutes
Servings: 1

Ingredients

  • 1 cup low-fat cottage cheese
  • ¾ cup fresh pineapple chunks
  • 1 tablespoon chopped walnuts or pecans
  • 1 teaspoon chia seeds
  • ½ teaspoon unsweetened shredded coconut (optional)
  • Fresh mint leaves for garnish (optional)

Optional Add-Ins

  • Sliced strawberries
  • Blueberries
  • Kiwi
  • Ground flaxseed
  • Hemp hearts
  • Drizzle of honey (if desired)
  • Sprinkle of cinnamon

Instructions

Step 1

Spoon the cottage cheese into a serving bowl.

Step 2

Top with the fresh pineapple chunks.

Step 3

Sprinkle the chopped walnuts, chia seeds, and shredded coconut over the top.

Step 4

Garnish with fresh mint leaves if desired.

Step 5

Serve immediately and enjoy a refreshing, protein-packed snack.

Nutrition Facts

Per Serving

Nutrient Amount
Calories 275
Protein 28 g
Carbohydrates 19 g
Fat 10 g
Saturated Fat 3 g
Fiber 4 g
Sugar 15 g
Sodium 420 mg
Potassium 470 mg
Calcium 220 mg
Vitamin C 48 mg

Nutrition values are approximate and may vary depending on the ingredients used.

Why You’ll Love This Recipe

  • Ready in just 5 minutes
  • High in protein to help keep you satisfied
  • Naturally sweet with no refined sugar
  • Rich in calcium to support bone health
  • Great for breakfast, snacks, or a light dessert
  • Refreshing and perfect for warm weather
  • Easily customizable with your favorite fruits and toppings

Helpful Tips

  • Choose fresh, ripe pineapple for the sweetest flavor.
  • If using canned pineapple, select fruit packed in 100% juice rather than syrup and drain well.
  • For extra crunch, lightly toast the walnuts before adding them to the bowl.
  • Meal prep by portioning the cottage cheese and toppings separately, then combine just before eating.
  • Keep leftovers refrigerated and enjoy within one day for the freshest taste.

Frequently Asked Questions

Can I use full-fat cottage cheese?

Absolutely. Full-fat cottage cheese creates an even creamier texture and can be a satisfying option depending on your dietary preferences.

Is this recipe good for weight management?

This bowl is rich in protein, which may help increase fullness and support healthy eating habits. It can be part of a balanced eating pattern when enjoyed in appropriate portions.

Can I use frozen pineapple?

Yes. Allow frozen pineapple to thaw slightly before serving so it doesn’t become too icy.

What other fruits pair well with cottage cheese?

Berries, peaches, mango, kiwi, grapes, and melon all pair wonderfully with cottage cheese.

Is Cottage Cheese & Pineapple Bowl healthy?

Yes. This recipe provides a balance of protein, healthy fats, fiber, vitamins, and minerals while using naturally sweet fruit instead of refined sugars. It’s a quick, nourishing option for women looking to enjoy a wholesome snack or light meal.

Is Breast Pain Normal Before a Period?

Understanding Cyclical Breast Pain, Causes, Relief, and When to See a Healthcare Provider

Many women notice that their breasts become sore, tender, swollen, or heavier in the days leading up to their period. If you’ve ever wondered whether this is normal, you’re not alone. Breast pain before menstruation is one of the most common symptoms of the menstrual cycle and is often linked to normal hormonal changes.

Although breast tenderness is usually nothing to worry about, it’s important to understand what causes it, how to relieve discomfort, and when breast pain may be a sign that you should seek medical attention.

In this guide, we’ll explain why breast pain happens before a period, what symptoms are considered normal, treatment options, lifestyle tips, and warning signs you shouldn’t ignore.

Is Breast Pain Before a Period Normal?

Yes. For many women, breast pain before a period is completely normal.

This type of discomfort is called cyclical breast pain (cyclical mastalgia) because it follows your menstrual cycle. It usually begins a few days to two weeks before your period starts and often improves or disappears once menstruation begins.

Hormonal fluctuations—particularly changes in estrogen and progesterone—can cause the breast tissue to swell and become more sensitive.

While not every woman experiences breast pain, it’s considered a common part of the menstrual cycle.

Why Do Breasts Hurt Before a Period?

The menstrual cycle causes hormone levels to rise and fall throughout the month.

During the second half of your cycle (after ovulation), estrogen and progesterone prepare your body for a possible pregnancy.

These hormonal changes can:

  • Increase fluid retention
  • Cause breast tissue to swell
  • Make milk ducts and glands enlarge temporarily
  • Increase breast sensitivity

As hormone levels decrease when your period begins, breast tenderness often improves.

Common Symptoms

Normal cyclical breast pain may include:

  • Tenderness in one or both breasts
  • Swelling
  • A feeling of fullness or heaviness
  • Aching or soreness
  • Increased sensitivity to touch
  • Pain that spreads toward the armpits

Many women notice symptoms affecting both breasts rather than just one.

When Does Breast Pain Usually Start?

Breast pain often begins:

  • A few days before menstruation
  • About one to two weeks before your period
  • After ovulation during the luteal phase of your cycle

Symptoms usually improve within the first few days of your period.

What Does Normal Breast Pain Feel Like?

Every woman experiences it differently.

Some describe:

  • A dull ache
  • A heavy feeling
  • Mild soreness
  • Sharp sensitivity when touched
  • General tenderness throughout the breast

Pain can range from barely noticeable to uncomfortable enough to affect daily activities.

Other Possible Causes of Breast Pain

While hormones are the most common cause before a period, breast pain isn’t always related to menstruation.

Other possible causes include:

Breast Cysts

Fluid-filled cysts can make breasts feel tender or lumpy.

Fibrocystic Breast Changes

Some women naturally have lumpier breast tissue that becomes more noticeable during hormonal changes.

Poorly Fitting Bras

Lack of proper support can contribute to breast discomfort, especially during exercise.

Muscle Strain

Pain from the chest muscles can sometimes feel like breast pain.

Pregnancy

Breast tenderness is often one of the earliest signs of pregnancy because hormone levels rise rapidly.

Certain Medications

Some medications, including hormone therapies, may contribute to breast tenderness.

Can Diet Affect Breast Pain?

Research on diet and breast pain is mixed, but maintaining a balanced diet may support overall health.

Some women find it helpful to:

  • Reduce excess sodium before their period to help minimize fluid retention.
  • Eat plenty of fruits and vegetables.
  • Choose whole grains instead of refined carbohydrates.
  • Include healthy fats from foods like salmon, walnuts, chia seeds, and flaxseeds.
  • Stay well hydrated.

Because responses vary from person to person, keeping a symptom diary may help identify whether certain foods seem to influence your discomfort.

Tips to Help Relieve Breast Pain

Fortunately, there are several ways to ease breast tenderness.

Wear a Supportive Bra

A properly fitted bra can reduce movement and improve comfort.

Sports bras may provide additional support during exercise.

Apply Warm or Cool Compresses

Some women find relief using:

  • Warm compresses
  • Heating pads (used safely)
  • Cool packs wrapped in a towel

Choose whichever feels most comfortable.

Stay Active

Regular physical activity supports overall health and may help some women manage menstrual symptoms.

Choose activities you enjoy, such as:

  • Walking
  • Swimming
  • Cycling
  • Yoga

Get Enough Sleep

Quality sleep supports hormone regulation and overall well-being.

Aim for 7 to 9 hours each night whenever possible.

Manage Stress

Stress doesn’t directly cause cyclical breast pain, but it can make discomfort feel more intense.

Helpful stress-management techniques include:

  • Deep breathing
  • Meditation
  • Gentle stretching
  • Journaling
  • Spending time outdoors

Over-the-Counter Pain Relief

If breast pain becomes uncomfortable, over-the-counter pain relievers may help for some people.

Because medications aren’t appropriate for everyone, follow the directions on the label and talk with your healthcare provider if you have questions or underlying medical conditions.

Should You Stop Exercising?

Not necessarily.

Many women can continue exercising normally.

If movement makes your breasts uncomfortable, wearing a supportive sports bra may reduce discomfort during workouts.

Is Breast Pain a Sign of Breast Cancer?

Most breast pain—especially pain that occurs before your period—is not caused by breast cancer.

Breast cancer is more commonly associated with:

  • A new lump that persists
  • Changes in breast shape
  • Skin dimpling
  • Nipple changes
  • Bloody nipple discharge

Although breast pain alone is usually not a sign of breast cancer, any new or persistent breast changes should be evaluated by a healthcare provider.

When Should You See a Healthcare Provider?

Schedule a medical evaluation if:

  • Pain affects only one breast and doesn’t improve.
  • Pain continues after your period ends.
  • You discover a new lump that doesn’t go away.
  • You notice nipple discharge, especially if it’s bloody.
  • Your breast becomes red, warm, or swollen.
  • Pain is severe or interferes with your daily activities.
  • You notice changes in the skin or nipple.
  • You’re concerned about any new breast symptom.

A healthcare provider may recommend a clinical breast exam or imaging, depending on your age, symptoms, and medical history.

Can You Prevent Breast Pain?

Not all breast pain can be prevented, especially when it’s caused by normal hormonal changes.

However, these healthy habits may help some women:

  • Wear supportive bras.
  • Exercise regularly.
  • Stay hydrated.
  • Eat a balanced diet.
  • Get adequate sleep.
  • Manage stress.
  • Maintain a healthy weight.

Frequently Asked Questions

Is it normal for only one breast to hurt before a period?

Cyclical breast pain usually affects both breasts, although one side may occasionally feel more uncomfortable than the other. Persistent pain in only one breast should be evaluated by a healthcare provider.

How many days before my period do breasts usually hurt?

Many women notice tenderness beginning about 3 to 10 days before menstruation, though timing varies from person to person.

Does breast pain mean my period is coming?

Breast tenderness is a common premenstrual symptom, but it isn’t a guaranteed sign that your period will start soon. Other factors, including pregnancy and certain medications, can also cause breast tenderness.

Is breast pain worse during perimenopause?

It can be. Hormone levels fluctuate more during perimenopause, and some women notice increased breast tenderness during this stage of life.

Can caffeine cause breast pain?

Research has not established that caffeine causes breast pain. Some women report symptom improvement after reducing caffeine, while others notice no difference.

Final Thoughts

Breast pain before a period is a common experience for many women and is usually linked to normal hormonal changes throughout the menstrual cycle. Although the tenderness can be uncomfortable, it often improves once your period begins and is not usually a sign of a serious health condition.

Pay attention to your body, track changes from month to month, and don’t hesitate to seek medical advice if something feels unusual or if pain is persistent, severe, or accompanied by other concerning symptoms. Understanding what’s normal for your body can help you feel more confident and empowered to care for your breast health throughout every stage of life.

How to Choose Healthier Meals and Prepare Them

Simple Tips to Build Nutritious Eating Habits That Last

Healthy eating doesn’t have to be complicated, expensive, or time-consuming. In fact, some of the healthiest meals are made with simple, wholesome ingredients that are easy to prepare at home. Whether your goal is to improve your energy, support hormone health, maintain a healthy weight, or simply feel your best, learning how to choose healthier meals is one of the most valuable skills you can develop.

Many women struggle with busy schedules, family responsibilities, and limited time to cook. As a result, it’s easy to rely on fast food, processed meals, or takeout. While there’s nothing wrong with enjoying these foods occasionally, making nutritious choices more often can have a positive impact on your overall health.

This guide will help you understand how to choose healthier meals, prepare them with confidence, and build eating habits that support long-term wellness.

Why Healthy Meals Matter

The food you eat provides your body with the nutrients it needs to function properly. A balanced diet can help support:

  • Healthy energy levels
  • Brain function and concentration
  • Heart health
  • Bone strength
  • Muscle maintenance
  • Immune function
  • Digestive health
  • Hormone production
  • Healthy skin and hair

Eating a variety of nutrient-rich foods also helps your body obtain essential vitamins, minerals, antioxidants, fiber, healthy fats, and protein.

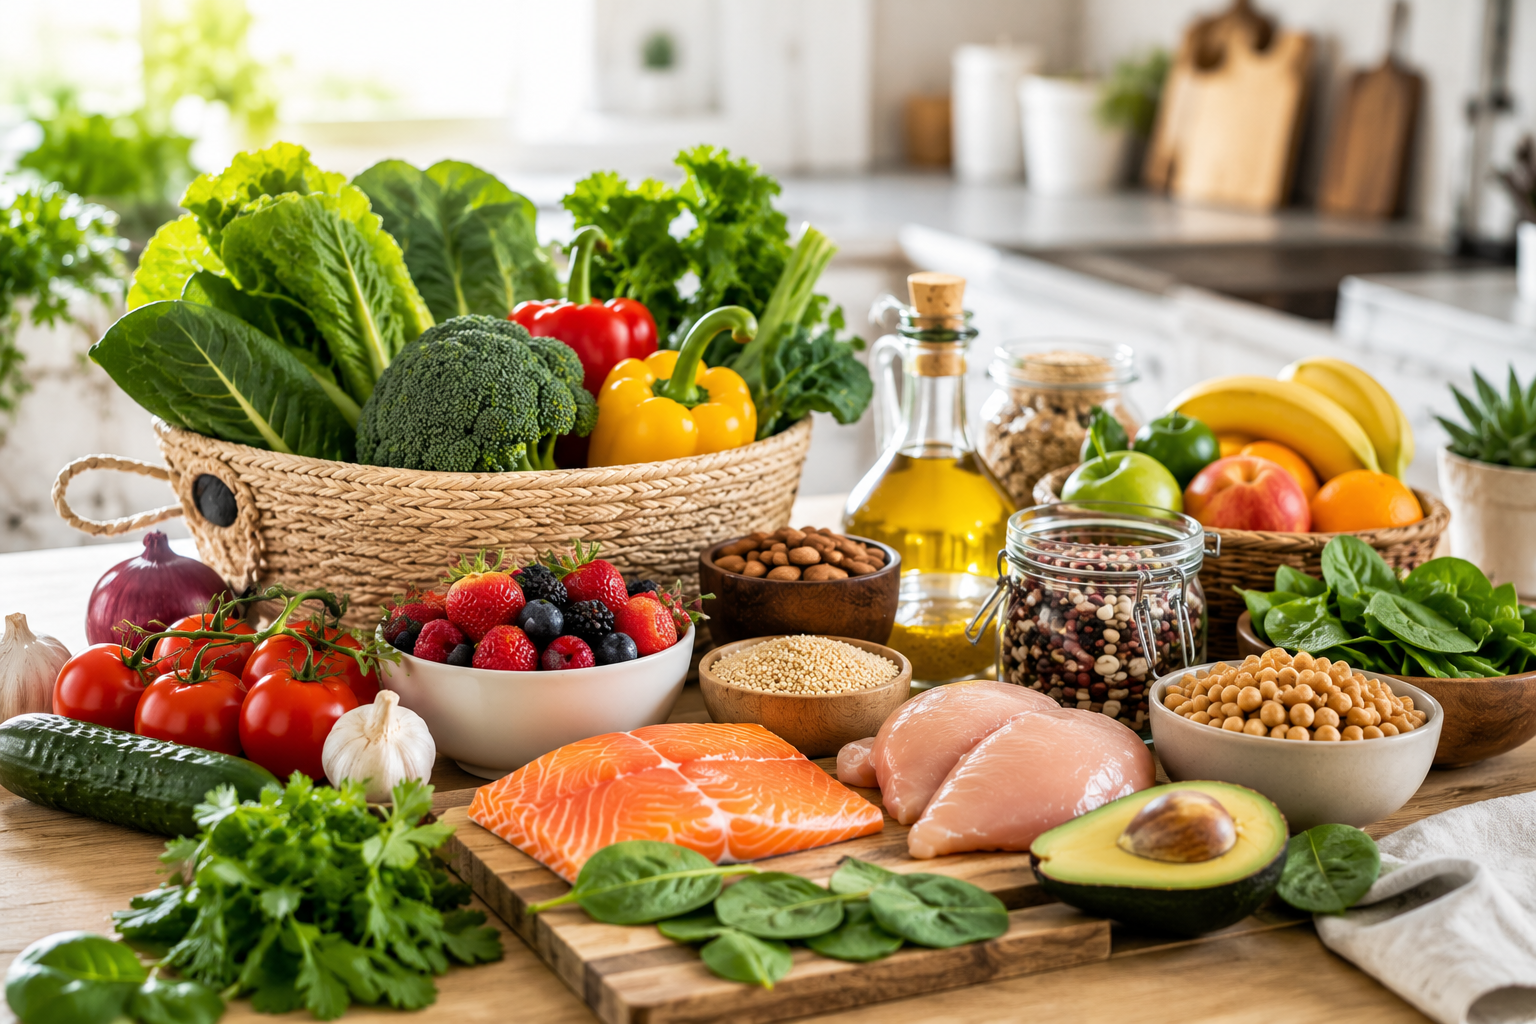
Start with Whole Foods

One of the easiest ways to improve your meals is to choose more whole foods.

Whole foods are foods that are minimally processed and close to their natural form.

Examples include:

  • Fresh fruits
  • Vegetables
  • Whole grains
  • Beans
  • Lentils
  • Nuts
  • Seeds
  • Eggs
  • Fish
  • Chicken
  • Plain Greek yogurt
  • Sweet potatoes

These foods often contain more nutrients and fiber than heavily processed alternatives.

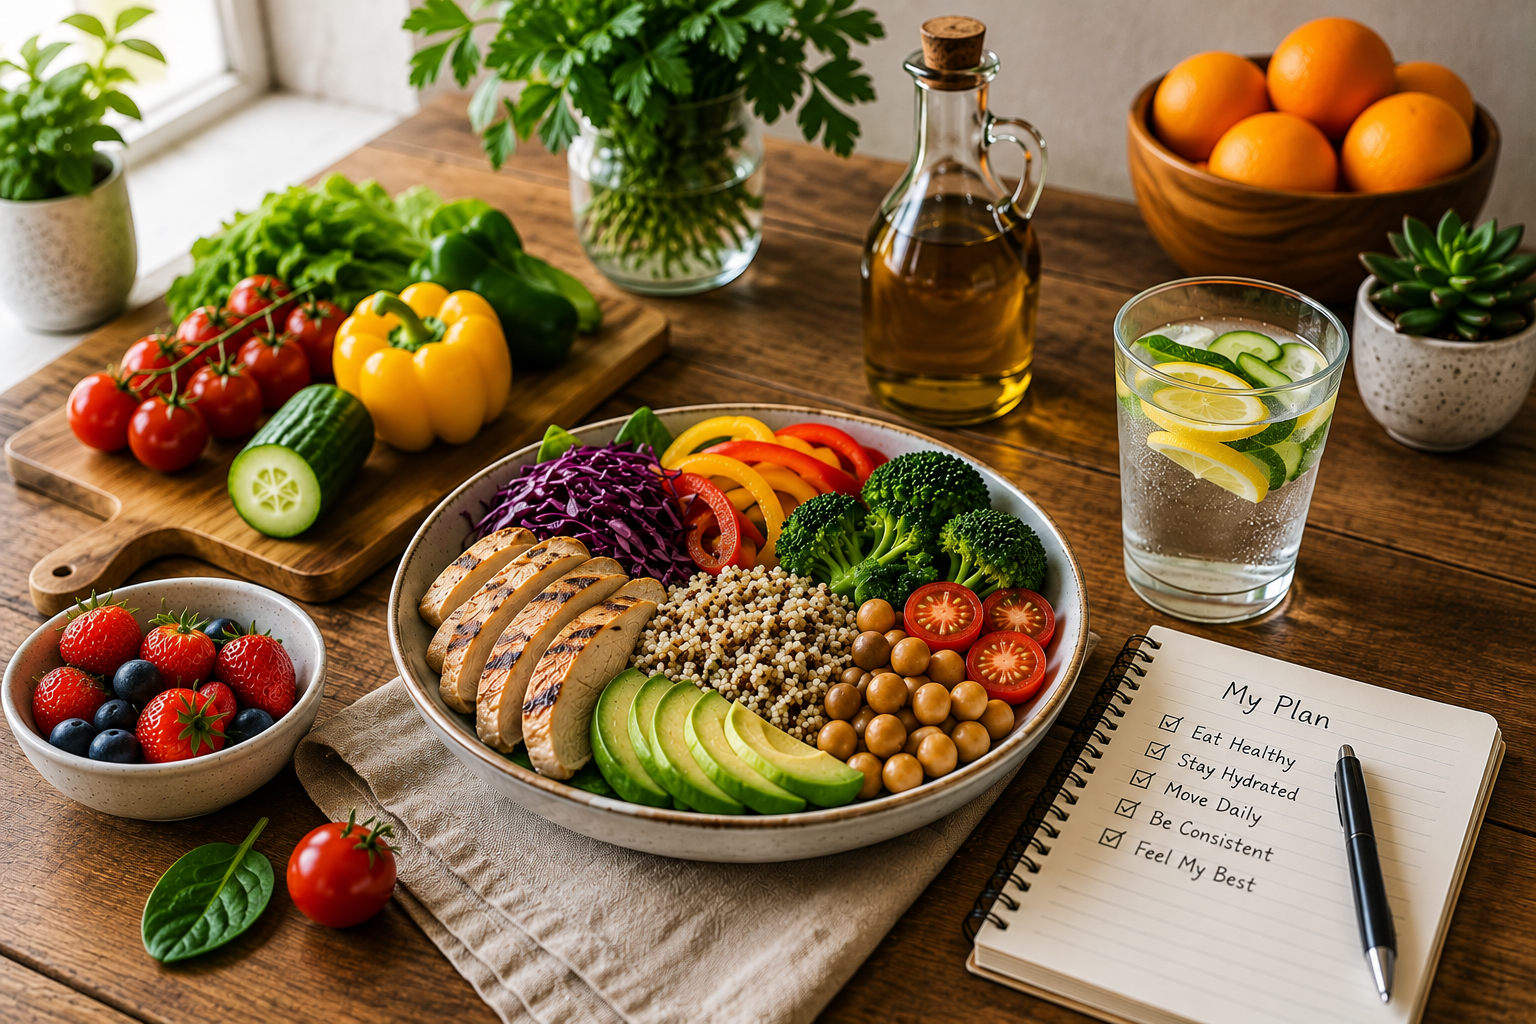
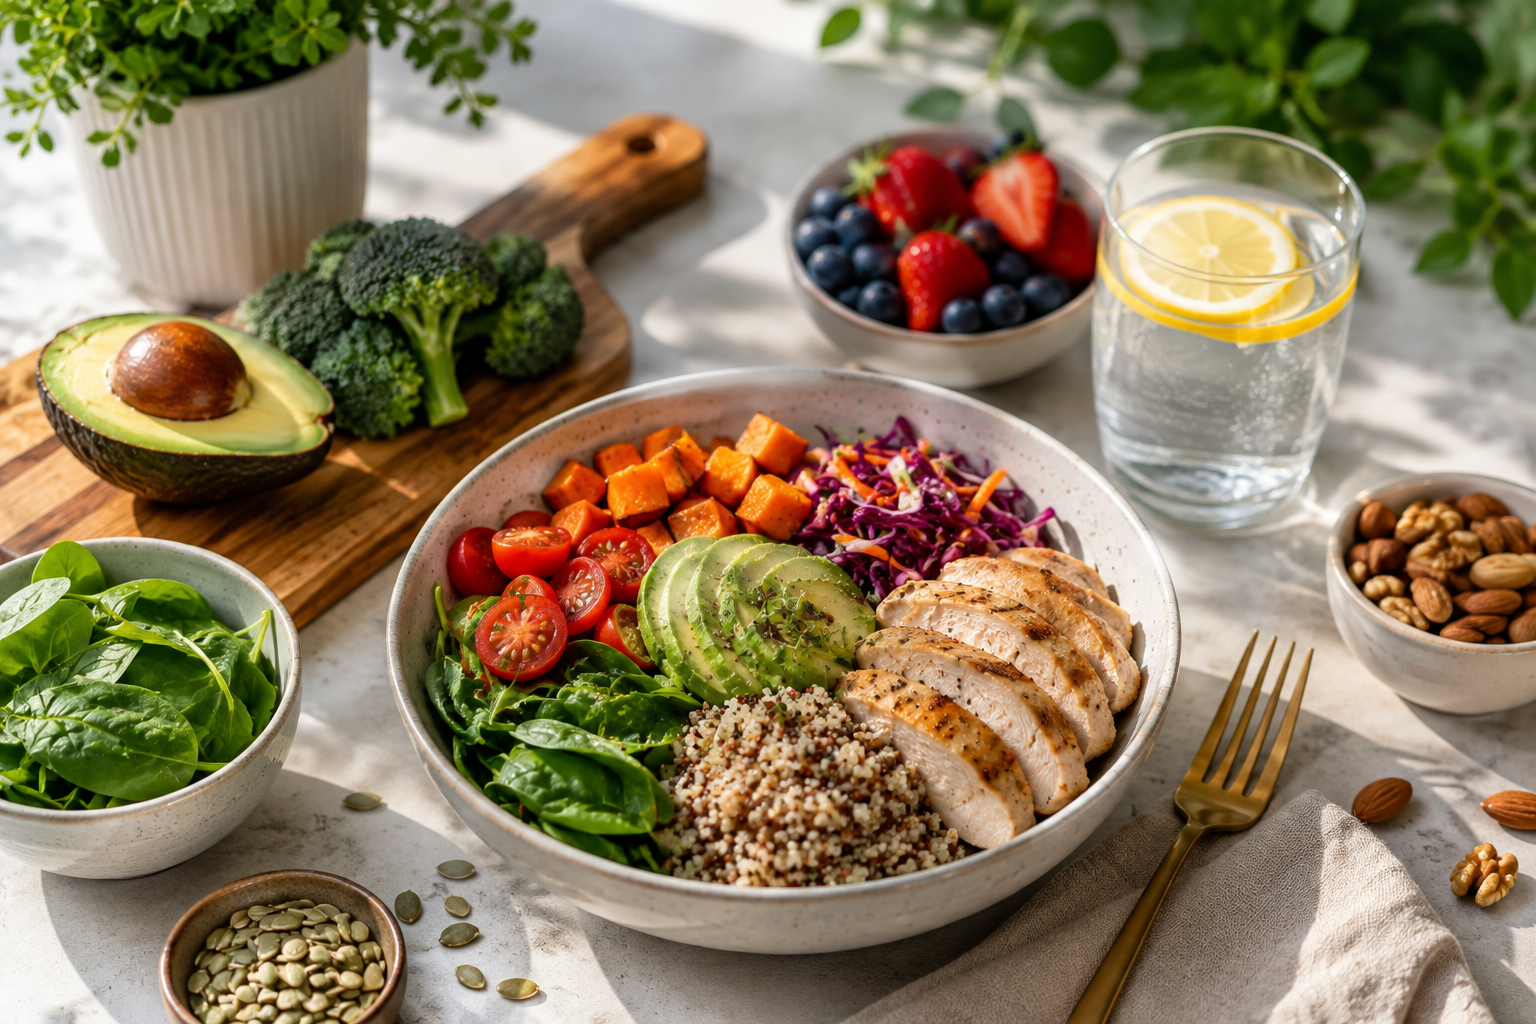
Build a Balanced Plate

A simple way to create healthier meals is to divide your plate into sections.

Aim for:

  • Half your plate: Colorful vegetables and fruits
  • One-quarter: Lean protein
  • One-quarter: Whole grains or starchy vegetables

Healthy fats can be added in moderate amounts through foods such as:

  • Avocados
  • Olive oil
  • Nuts
  • Seeds

This balanced approach helps provide protein, fiber, vitamins, minerals, and satisfying healthy fats.

Choose Lean Protein

Protein plays an important role in building and repairing tissues while helping you stay full between meals.

Healthy protein options include:

  • Salmon
  • Tuna
  • Chicken breast
  • Turkey
  • Eggs
  • Greek yogurt
  • Cottage cheese
  • Tofu
  • Lentils
  • Black beans
  • Chickpeas

Including protein with meals and snacks may help reduce hunger and support muscle health.

Fill Up on Colorful Vegetables

Different colored vegetables provide different nutrients.

Try including vegetables like:

  • Spinach
  • Broccoli
  • Bell peppers
  • Carrots
  • Tomatoes
  • Brussels sprouts
  • Green beans
  • Cauliflower
  • Zucchini
  • Kale

Eating a variety of colors throughout the week helps increase the diversity of nutrients in your diet.

Choose Smart Carbohydrates

Carbohydrates provide your body with energy, but not all carbohydrate sources are equally nutritious.

Instead of refined grains, choose:

  • Brown rice
  • Quinoa
  • Oats
  • Whole wheat bread
  • Whole wheat pasta
  • Barley
  • Sweet potatoes

Whole grains contain more fiber, which supports digestion and helps you feel satisfied longer.

Include Healthy Fats

Healthy fats are important for hormone production, brain health, and absorbing certain vitamins.

Good choices include:

  • Olive oil
  • Avocados
  • Almonds
  • Walnuts
  • Chia seeds
  • Flaxseeds
  • Natural peanut butter

A little goes a long way since healthy fats are calorie-dense.

Read Food Labels

Reading nutrition labels can help you make informed decisions.

Look for foods that are:

  • Lower in added sugars
  • Lower in sodium
  • Higher in fiber
  • Rich in protein
  • Made with recognizable ingredients

Pay attention to serving sizes, as they may be smaller than expected.

Plan Your Meals

Meal planning helps reduce stress and makes healthy eating more convenient.

Start by choosing a few meals for the week.

Make a grocery list based on those meals to avoid unnecessary purchases and reduce food waste.

Simple meal ideas include:

  • Grilled salmon with roasted vegetables
  • Chicken stir-fry with brown rice
  • Turkey chili
  • Greek yogurt with berries and granola
  • Vegetable omelet with whole-grain toast
  • Quinoa salad with grilled chicken

Prepare Healthy Meals at Home

Cooking at home gives you more control over ingredients and portion sizes.

Healthy cooking methods include:

  • Baking
  • Grilling
  • Roasting
  • Steaming
  • Air frying
  • Sautéing with small amounts of olive oil

These methods often require less added fat than deep frying.

Keep Healthy Ingredients on Hand

Stock your kitchen with nutritious staples such as:

  • Frozen vegetables
  • Frozen fruit
  • Brown rice
  • Quinoa
  • Oats
  • Canned beans
  • Tuna
  • Eggs
  • Olive oil
  • Herbs and spices
  • Nuts
  • Seeds

Having healthy ingredients readily available makes preparing meals much easier.

Make Healthy Swaps

Small substitutions can improve the nutritional value of your meals.

Try swapping:

Instead of white rice → Brown rice

Instead of sour cream → Plain Greek yogurt

Instead of sugary cereal → Oatmeal

Instead of chips → Roasted chickpeas

Instead of soda → Sparkling water with fruit

Instead of creamy dressings → Olive oil and vinegar

These simple changes can add up over time.

Watch Portion Sizes

Even nutritious foods can contribute to excess calorie intake if portions become too large.

Helpful tips include:

  • Use smaller plates.
  • Eat slowly.
  • Stop eating when comfortably satisfied.
  • Avoid eating directly from large packages.
  • Portion snacks into small containers.

Listening to your hunger and fullness cues may help prevent overeating.

Stay Hydrated

Water supports nearly every function in the body.

Aim to drink water regularly throughout the day.

You can also increase hydration by eating foods with high water content such as:

  • Cucumbers
  • Watermelon
  • Strawberries
  • Celery
  • Oranges
  • Lettuce

Sometimes thirst can be mistaken for hunger.

Healthy Snacks Matter Too

Nutritious snacks can help maintain energy between meals.

Healthy options include:

  • Apple slices with peanut butter
  • Greek yogurt with berries
  • Cottage cheese with pineapple
  • Mixed nuts
  • Hummus and vegetables
  • Hard-boiled eggs
  • Roasted chickpeas
  • Homemade energy bites

Combining protein and fiber often helps snacks feel more satisfying.

Don’t Aim for Perfection

Healthy eating isn’t about eliminating your favorite foods forever.

Instead, focus on consistency.

Enjoy treats occasionally while making nutritious choices most of the time.

A balanced lifestyle is more sustainable than following strict or overly restrictive diets.

Frequently Asked Questions

What is the healthiest meal I can eat?

There’s no single healthiest meal. A balanced meal that includes lean protein, vegetables, whole grains, and healthy fats is a great choice for most people.

Is cooking at home healthier?

Often, yes. Preparing meals at home allows you to control ingredients, cooking methods, sodium, added sugars, and portion sizes.

How can I eat healthy on a budget?

Choose affordable staples like beans, oats, eggs, frozen vegetables, canned tuna, brown rice, and seasonal produce. Buying in bulk and planning meals can also help save money.

Do I have to give up desserts?

No. Enjoying desserts in moderation can fit into a healthy eating pattern. Choosing healthier versions made with whole-food ingredients can also be a satisfying option.

What’s the easiest healthy meal for beginners?

A simple grilled chicken breast with roasted vegetables and brown rice is easy to prepare, balanced, and nutritious. Baked salmon with broccoli and quinoa is another excellent beginner-friendly meal.

Final Thoughts

Choosing healthier meals doesn’t require perfection or complicated recipes. Small, consistent changes—like filling your plate with colorful vegetables, choosing lean proteins, cooking more meals at home, and planning ahead—can make a meaningful difference over time.

Remember that healthy eating is a journey, not a destination. Every nutritious meal is an opportunity to nourish your body and support your long-term health. By making thoughtful choices and preparing simple, balanced meals, you can build habits that help you feel energized, confident, and well for years to come.


How to Treat a Yeast Infection: Causes, Symptoms, Treatment, and Prevention

Yeast infections are one of the most common vaginal health concerns women experience. In fact, it’s estimated that about 3 out of 4 women will have at least one yeast infection during their lifetime. While they can be uncomfortable and frustrating, the good news is that most yeast infections are treatable and often clear up with the right care.

If you’ve ever experienced itching, burning, or unusual discharge, you may have wondered whether you have a yeast infection and what you can do to feel better. In this guide, we’ll explain what yeast infections are, how to recognize the symptoms, treatment options, home care tips, and when it’s important to see a healthcare provider.

What Is a Yeast Infection?

A vaginal yeast infection, also known as vaginal candidiasis, is a fungal infection caused by an overgrowth of a yeast called Candida, most commonly Candida albicans.

Candida naturally lives in the vagina alongside healthy bacteria. Under normal circumstances, these microorganisms stay in balance. However, certain factors can disrupt this balance, allowing yeast to multiply and cause an infection.

Although yeast infections are common, they’re not considered a sexually transmitted infection (STI). They can affect women of all ages, especially during their reproductive years.

Common Symptoms of a Yeast Infection

Symptoms can range from mild to severe and can include:

  • Intense vaginal itching
  • Burning around the vaginal opening
  • Redness or swelling of the vulva
  • Thick, white vaginal discharge that looks like cottage cheese
  • Little or no odor
  • Pain during urination, especially if urine touches irritated skin
  • Pain or discomfort during sexual intercourse
  • Small cracks or irritation in the skin around the vulva

Not every woman experiences all of these symptoms, and symptoms can overlap with other vaginal conditions such as bacterial vaginosis or certain sexually transmitted infections.

What Causes Yeast Infections?

Several factors can increase the risk of developing a yeast infection, including:

Antibiotic Use

Antibiotics kill harmful bacteria but can also reduce the healthy bacteria that normally help keep yeast under control.

Hormonal Changes

Pregnancy, hormonal birth control, and hormone therapy may increase the likelihood of yeast overgrowth in some women.

Diabetes

High blood sugar levels can promote yeast growth, especially if diabetes is not well controlled.

A Weakened Immune System

Certain medical conditions or medications that affect the immune system may make yeast infections more likely.

Moist Environments

Wearing damp workout clothes or staying in wet swimsuits for long periods can create a warm, moist environment where yeast thrives.

High Blood Sugar

Frequent spikes in blood sugar may encourage yeast growth in some individuals.

How Is a Yeast Infection Diagnosed?

If this is your first suspected yeast infection or your symptoms are severe, it’s a good idea to see a healthcare provider.

Diagnosis may include:

  • Asking about your symptoms and medical history
  • A pelvic examination
  • Collecting a sample of vaginal discharge to examine under a microscope or send to a laboratory if needed

Getting the correct diagnosis is important because not every case of vaginal itching or discharge is caused by a yeast infection.

How to Treat a Yeast Infection

Treatment depends on the severity of symptoms and whether the infection is occasional or recurring.

Over-the-Counter Antifungal Medications

Many uncomplicated yeast infections respond well to over-the-counter antifungal creams, ointments, suppositories, or vaginal tablets. These products are available in one-day, three-day, and seven-day treatment options.

Examples include medications containing antifungal ingredients such as:

  • Miconazole
  • Clotrimazole
  • Tioconazole

Always follow the package instructions carefully and complete the full course of treatment, even if symptoms improve sooner.

Prescription Medication

A healthcare provider may prescribe an oral antifungal medication or a stronger antifungal cream if:

  • Symptoms are severe
  • The infection keeps coming back
  • Over-the-counter treatment doesn’t work
  • You have certain medical conditions that require additional evaluation

Take prescription medications exactly as directed.

Home Care Tips to Help You Feel More Comfortable

While medication treats the infection, these simple self-care measures may help reduce discomfort:

  • Wear loose-fitting cotton underwear.
  • Change out of sweaty clothes right after exercising.
  • Avoid scented soaps, feminine sprays, or douches.
  • Gently clean the vulva with warm water and mild, unscented soap if needed.
  • Avoid scratching the affected area, which can worsen irritation.
  • Stay well hydrated and eat a balanced diet.

Can Diet Help?

Research is ongoing, but maintaining an overall healthy eating pattern may support general health.

Focus on:

  • Plenty of vegetables
  • Whole grains
  • Lean protein
  • Healthy fats
  • Foods rich in fiber

If you have diabetes, keeping blood sugar within your target range may also reduce your risk of recurring infections.

Can Probiotics Help?

Some women choose to include probiotic-rich foods such as:

  • Plain yogurt with live cultures
  • Kefir
  • Fermented vegetables

While research has not conclusively shown that probiotics treat yeast infections, they may support a healthy balance of bacteria in the body for some people. They should not replace proven antifungal treatments.

What to Avoid During a Yeast Infection

While you’re recovering, it may help to avoid:

  • Tight clothing
  • Wet swimsuits for extended periods
  • Scented pads or tampons
  • Bubble baths
  • Vaginal douching
  • Harsh cleansers
  • Wearing the same workout clothes after exercising

How to Help Prevent Future Yeast Infections

Although not every infection can be prevented, these habits may lower your risk:

  • Wear breathable cotton underwear.
  • Change out of damp clothing promptly.
  • Avoid unnecessary antibiotic use (only take antibiotics as prescribed).
  • Manage blood sugar if you have diabetes.
  • Wipe from front to back after using the bathroom.
  • Avoid scented feminine hygiene products.
  • Keep the genital area clean and dry.

When Should You See a Healthcare Provider?

You should seek medical advice if:

  • This is your first suspected yeast infection.
  • You’re pregnant.
  • Symptoms don’t improve after treatment.
  • Symptoms return within two months.
  • You have frequent yeast infections (four or more per year).
  • You develop fever, severe pelvic pain, or foul-smelling discharge.
  • You’re unsure whether your symptoms are caused by a yeast infection.

These symptoms may indicate another condition that requires different treatment.

Frequently Asked Questions

Can a yeast infection go away on its own?

Some mild infections may improve, but many require antifungal treatment. If you’re unsure, speak with a healthcare provider rather than waiting for symptoms to worsen.

Is a yeast infection contagious?

Yeast infections are generally not considered sexually transmitted infections, although sexual activity can sometimes contribute to irritation or, less commonly, yeast transmission between partners.

Can I exercise with a yeast infection?

Yes, but it’s a good idea to change out of sweaty workout clothes as soon as possible to reduce moisture.

Can stress cause yeast infections?

Stress itself is not a direct cause, but chronic stress may affect immune function, which could contribute to an increased risk in some people.

Can I have sex during a yeast infection?

Many healthcare providers recommend waiting until treatment is complete and symptoms have resolved. Sexual activity may worsen irritation and some antifungal creams can weaken latex condoms and diaphragms.

Final Thoughts

Yeast infections are common, treatable, and usually not a cause for alarm. Recognizing the symptoms early and using appropriate antifungal treatment can often bring relief within a few days. Just as importantly, maintaining healthy habits—such as wearing breathable clothing, avoiding unnecessary antibiotics, and practicing gentle vulvar care—may help reduce the chances of future infections.

If your symptoms are severe, keep coming back, or don’t improve with treatment, don’t ignore them. A healthcare provider can determine whether a yeast infection is truly the cause and recommend the most appropriate treatment. Taking care of your vaginal health is an important part of your overall well-being, and seeking medical advice when needed is always a smart step.


Healthy Honey Garlic Baked Salmon

A Flavor-Packed Dinner That’s Rich in Protein and Heart-Healthy Omega-3s

If you’re looking for a meal that’s both nourishing and incredibly delicious, this Healthy Honey Garlic Baked Salmon deserves a spot on your weekly menu. Tender salmon fillets are coated in a sweet and savory honey garlic glaze, then baked until perfectly flaky. It’s a simple recipe that feels restaurant-worthy while using wholesome ingredients you likely already have at home.

Salmon is one of the best sources of omega-3 fatty acids, which support heart health, brain function, and overall wellness. Paired with fresh garlic, a touch of honey, and a squeeze of lemon, this dish delivers incredible flavor without relying on heavy sauces or excessive sodium.

Whether you’re preparing a quick family dinner or meal prepping lunches for the week, this healthy baked salmon recipe is satisfying, easy to make, and ready in about 30 minutes.

Healthy Honey Garlic Baked Salmon Recipe

Prep Time: 10 minutes
Cook Time: 15–18 minutes
Total Time: 25–30 minutes
Servings: 4

Ingredients

  • 4 salmon fillets (about 6 ounces each), skin on or skin removed
  • 3 tablespoons honey
  • 3 cloves garlic, minced
  • 2 tablespoons low-sodium soy sauce (or use 1½ tablespoons regular soy sauce + ½ tablespoon water. If using regular soy sauce, you may want to reduce or omit the sea salt to prevent the glaze from becoming too salty.)
  • 1 tablespoon fresh lemon juice (or 1 tablespoon bottled lemon juice)
  • 1 tablespoon olive oil
  • 1 teaspoon Dijon mustard
  • ½ teaspoon smoked paprika
  • ¼ teaspoon black pepper
  • ¼ teaspoon sea salt (optional if using regular soy sauce)
  • 1 tablespoon chopped fresh parsley (or 1 teaspoon dried parsley flakes)
  • Lemon slices for garnish (optional)

Optional Side Dishes

  • Roasted broccoli
  • Steamed asparagus
  • Brown rice
  • Quinoa
  • Roasted sweet potatoes
  • Mixed green salad

Instructions

Step 1

Preheat your oven to 400°F (200°C).

Lightly grease a baking dish or line it with parchment paper.

Step 2

Pat the salmon fillets dry with paper towels.

If you prefer skinless salmon, you can remove the skin before cooking. Place the salmon skin-side down on a cutting board and carefully slide a sharp knife between the flesh and the skin while gently pulling the skin away.

If the skin is difficult to remove, you can first place the salmon skin-side down in warm (not hot) water for 30–60 seconds. This can help loosen the skin, making it easier to separate from the flesh. Remove the salmon from the water, pat it completely dry with paper towels, then remove the skin with a sharp knife.

If you’re purchasing fresh salmon from a seafood counter, you can also ask the staff to remove the skin for you before you take it home.

Place the salmon fillets in the prepared baking dish.

Step 3

In a small bowl, whisk together:

  • Honey
  • Garlic
  • Soy sauce
  • Lemon juice
  • Olive oil
  • Dijon mustard
  • Smoked paprika
  • Black pepper
  • Sea salt (if using low-sodium soy sauce; reduce or omit if using regular soy sauce)

Step 4

Brush the honey garlic glaze generously over each salmon fillet.

If desired, reserve a small amount of the glaze before brushing it onto the raw salmon to drizzle over the cooked fish when serving.

Step 5

Bake for 15–18 minutes, depending on the thickness of the salmon, or until it flakes easily with a fork and reaches an internal temperature of 145°F (63°C).

Step 6

Remove from the oven and spoon the flavorful juices from the baking dish over the salmon.

Step 7

Sprinkle with fresh parsley or dried parsley flakes and garnish with lemon slices before serving.

Nutrition Facts

Per Serving (1 salmon fillet)

Nutrient Amount
Calories 355
Protein 35 g
Carbohydrates 11 g
Fat 19 g
Saturated Fat 3 g
Fiber 0 g
Sugar 10 g
Sodium 390 mg*
Potassium 720 mg
Calcium 25 mg
Iron 1.2 mg
Omega-3 Fatty Acids Approximately 2,000 mg

*Nutrition values are approximate and will vary depending on whether low-sodium or regular soy sauce is used and any ingredient substitutions.

Why You’ll Love This Recipe

  • Rich in heart-healthy omega-3 fatty acids
  • High in protein to help keep you feeling full
  • Sweet and savory flavor with simple pantry ingredients
  • Ready in about 30 minutes
  • Perfect for busy weeknights
  • Naturally gluten-free when using gluten-free soy sauce
  • Great for meal prep
  • Easy to customize with common ingredient substitutions

Helpful Tips

  • Choose salmon fillets that are similar in thickness so they cook evenly.
  • Don’t overcook the salmon—it should flake easily while remaining moist inside.
  • Marinate the salmon for 15–30 minutes before baking for even more flavor.
  • If you prefer skinless salmon, remove the skin before baking using a sharp knife, try the warm water method, or ask your grocery store’s seafood department to remove it for you.
  • If the skin is difficult to remove, place the salmon skin-side down in warm (not hot) water for 30–60 seconds, pat it completely dry, then carefully slide a sharp knife between the flesh and the skin. Avoid using hot water, as it can begin to cook the edges of the salmon.
  • If using regular soy sauce instead of low-sodium soy sauce, consider reducing or omitting the added sea salt to keep the glaze from becoming overly salty.
  • Bottled lemon juice works well if you don’t have fresh lemons available.
  • Dried parsley flakes are a convenient substitute for fresh parsley. Use about 1 teaspoon dried parsley in place of 1 tablespoon fresh parsley.
  • Pair with roasted vegetables or a whole grain for a balanced meal.
  • Store leftovers in an airtight container in the refrigerator for up to 3 days.

Frequently Asked Questions

Can I use frozen salmon?

Yes. Thaw the salmon completely and pat it dry before adding the glaze for the best texture and flavor.

Can I cook this in the air fryer?

Absolutely. Air fry at 390°F for 8–10 minutes, depending on the thickness of the fillets and your air fryer model.

What vegetables pair well with this salmon?

Broccoli, asparagus, Brussels sprouts, green beans, zucchini, carrots, roasted sweet potatoes, and cauliflower all pair wonderfully with the honey garlic glaze.

Is Honey Garlic Baked Salmon healthy?

Yes. Salmon is naturally rich in high-quality protein, omega-3 fatty acids, vitamin D, selenium, and B vitamins. Combined with a light honey garlic glaze and baked instead of fried, this recipe is a nutritious choice that fits well into a balanced eating pattern.

Can I make this recipe ahead of time?

Yes. You can prepare the honey garlic glaze up to 2 days in advance and store it in the refrigerator. You can also marinate the salmon for 15–30 minutes before baking to enhance the flavor.

Can I use bottled lemon juice instead of fresh?

Yes. Bottled lemon juice is a convenient substitute and works well in this recipe when fresh lemons aren’t available.

Can I use dried parsley instead of fresh parsley?

Absolutely. Replace 1 tablespoon of fresh parsley with 1 teaspoon of dried parsley flakes. Sprinkle the dried parsley over the salmon after baking for the best flavor and presentation.

Can I remove the skin from the salmon?

Yes. You can prepare this recipe with either skin-on or skinless salmon fillets.

To remove the skin, place the salmon skin-side down on a cutting board and carefully slide a sharp knife between the flesh and the skin while gently pulling the skin away.

If the skin is difficult to remove, try the warm water method. Place the salmon skin-side down in warm (not hot) water for 30–60 seconds, then pat it completely dry. The skin should loosen, making it easier to remove with a sharp knife.

If you’re buying fresh salmon from a seafood counter, you can also ask the staff to remove the skin for you before you take it home.

Tip: Avoid using hot water or soaking the salmon for too long, as it can begin to cook the outer edges of the fish.